

Textured Wall Art: Elevating Your Space with Depth, Dimension, and Timeless Style
In the world of interior design, few elements capture attention quite like Textured Wall Art. Unlike flat prints or standard paintings, textured wall art adds layers of physical depth that play with light and shadow, creating a dynamic focal point in any room. Whether you're drawn to the organic feel of plaster swirls or the bold sculptural forms of modern abstracts, this art form transforms blank walls into immersive experiences. If you're seeking affordable, high-impact decor that blends artistry with functionality, Textured Wall Art offers endless inspiration and ready-to-hang options crafted by skilled artists.
This guide dives deep into everything you need to know about textured wall art—from its rich history and DIY possibilities to professional pieces, styling tips, and maintenance. By the end, you'll have the tools (and confidence) to create or curate your own masterpiece. With approximately 1,800 words of fresh insights, practical advice, and visual examples, you'll discover why textured wall art has become a staple in contemporary homes, galleries, and offices worldwide.
The Allure of Textured Wall Art: Why It's More Than Just Decoration
Textured wall art isn't a passing trend—it's a celebration of tactility in an increasingly digital world. Originating from ancient techniques like frescoes and bas-relief sculptures, modern interpretations use materials such as joint compound, modeling paste, acrylics, and even natural elements like sand or fibers to build dimension on canvas or directly on walls. The result? Pieces that invite touch, shift appearance throughout the day, and evoke emotion through their physical presence.
One of the biggest draws is versatility. Abstract wall art in textured styles can suit minimalist Scandinavian interiors, bohemian lofts, or luxurious modern spaces. Neutral earth tones create calm serenity, while vibrant metallics or deep jewel hues add drama. Unlike smooth canvas prints that can feel two-dimensional and lifeless, textured pieces absorb and reflect light differently, making rooms feel larger, warmer, and more alive.
Homeowners and designers love textured wall art for its ability to hide imperfections on walls while adding personality. It's also eco-friendly when using thrifted canvases or sustainable materials. Plus, the DIY movement has exploded, allowing beginners to craft professional-looking results without formal art training. As we'll explore, simple tools from your local hardware store can yield stunning outcomes that rival gallery pieces.
Getting Started with DIY Textured Wall Art: Materials and Tools You Need
Creating your own textured wall art is accessible, budget-friendly, and incredibly rewarding. Drawing from popular techniques like those used in thrifted canvas transformations, you can achieve layered, aged effects that feel custom and unique. Here's a comprehensive materials list for a beginner-friendly project on a standard 24x36-inch canvas:
- Base canvas: New or thrifted framed canvas (thrift stores often have gems for under $20).
- Texturing mediums: Joint compound (smooth and creamy) or plaster of Paris (grittier, faster-drying). For advanced depth, try flexible modeling paste to prevent cracking.
- Paints: Acrylics in 3-5 complementary shades (e.g., neutrals with metallic accents).
- Tools: Putty knife or trowel, palette knives, sandpaper (120-220 grit), painter's tape, primer, and matte sealer spray or brush-on poly.
- Optional add-ins: Glitter, sand, or fibers for extra texture; water for blending.
Total cost? Often under $50 if you repurpose items. Always work in a well-ventilated area and wear gloves—messy fun is part of the process!
Step-by-Step Guide to Crafting Your Own Textured Canvas Masterpiece
Ready to roll up your sleeves? This expanded DIY method builds on classic layering but incorporates modern twists for richer results. Aim for 3-4 layers to achieve that coveted patina.
Step 1: Prep Your Canvas Tape off the frame edges to protect them. If using a used canvas, apply a coat of primer or white acrylic to block bleed-through. Let it dry fully—this ensures your textures adhere perfectly without unwanted color shifts.
Step 2: Build the Base Layer Mix your primary medium (joint compound for smooth applications or plaster for organic grit). Spread it unevenly across the canvas using a wide trowel or putty knife. Vary thickness from 1/8 to 1/4 inch in areas to create natural highs and lows. For interest, swirl in subtle base paint colors now. This layer sets the foundation—think of it as your canvas's "skin." Allow overnight drying; plaster sets faster, while joint compound may need 24 hours.
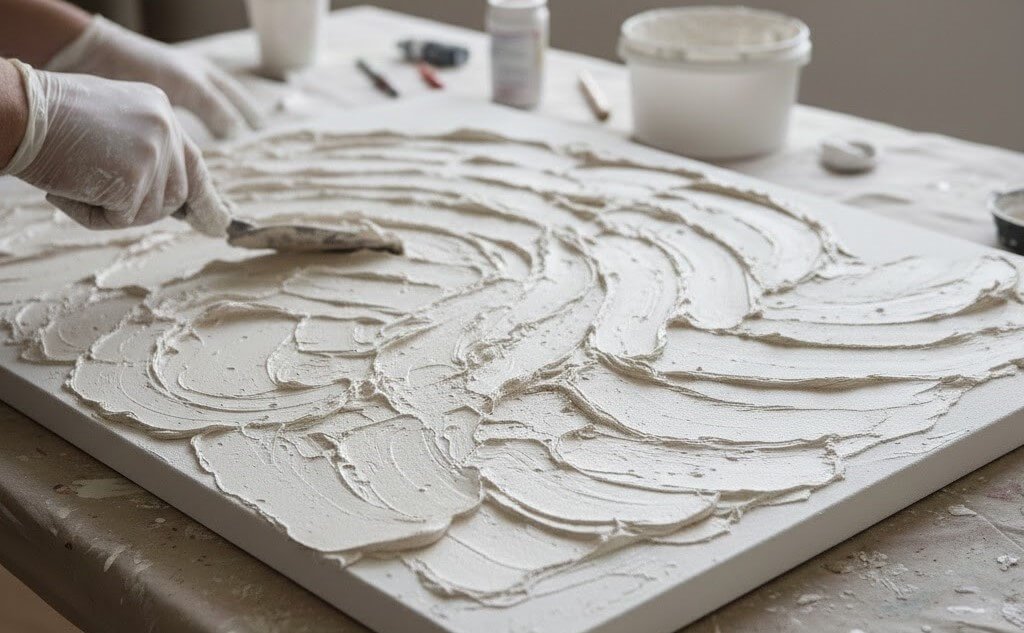
Step 3: Layer for Depth and Dimension Once dry, lightly sand high spots for smoothness. Apply a second layer in contrasting tones—perhaps a muted gray-brown mixed into more compound. Use palette knives to create deliberate strokes, ridges, or even imprinted patterns (like circles or waves). Experiment here: dilute with water for softer blends or add metallic paint for shimmer. On larger pieces, work in sections to avoid drying mid-application. A helper (even a curious child!) can make this collaborative and joyful.
Step 4: Add Final Textural Accents For the top layer, use a thinner mix of plain or lightly tinted medium. Dab or drag it selectively, leaving glimpses of underlying colors. This "peek-a-boo" effect mimics aged frescoes. Incorporate subtle elements like pressed fabric textures or light sand sprinkling for tactile variety. Dry completely—patience prevents cracking.
Step 5: Refine and Seal Sand the entire surface gently for a polished yet organic finish. Wipe away dust with a damp cloth or soft brush. Apply 1-2 coats of matte sealer; brush-on formulas offer superior even coverage and UV protection compared to sprays. Note: Sealers may slightly darken colors, so test on a scrap first.
The entire process takes 2-3 days but yields heirloom-quality art. Pro tip: Work intuitively—no two pieces will be identical, which is the beauty of handmade textured wall art.

Variations and Advanced Techniques for Personalized Textured Wall Art
Beyond basics, explore these creative spins to make your piece truly one-of-a-kind:
- Metallic Accents: Incorporate gold leaf or mica powders in the final layer for luxurious shine.
- Mixed Media: Embed natural items like dried botanicals or recycled paper for eco-textured looks.
- Geometric vs. Organic: Use tape for sharp lines or freehand for flowing abstracts.
- Wall-Mounted Direct Application: Skip the canvas and texture directly on accent walls using the same mediums for immersive, large-scale impact.
For those preferring ready-made excellence, browse collections of hand-painted textured abstract art. These oversized canvases feature sculptural elements, vibrant palettes (teal-greens, blush pinks, earthy beiges), and professional craftsmanship—perfect for those short on time but big on style. Many offer custom sizing and worldwide shipping.
Styling Textured Wall Art in Your Home: Design Tips That Wow
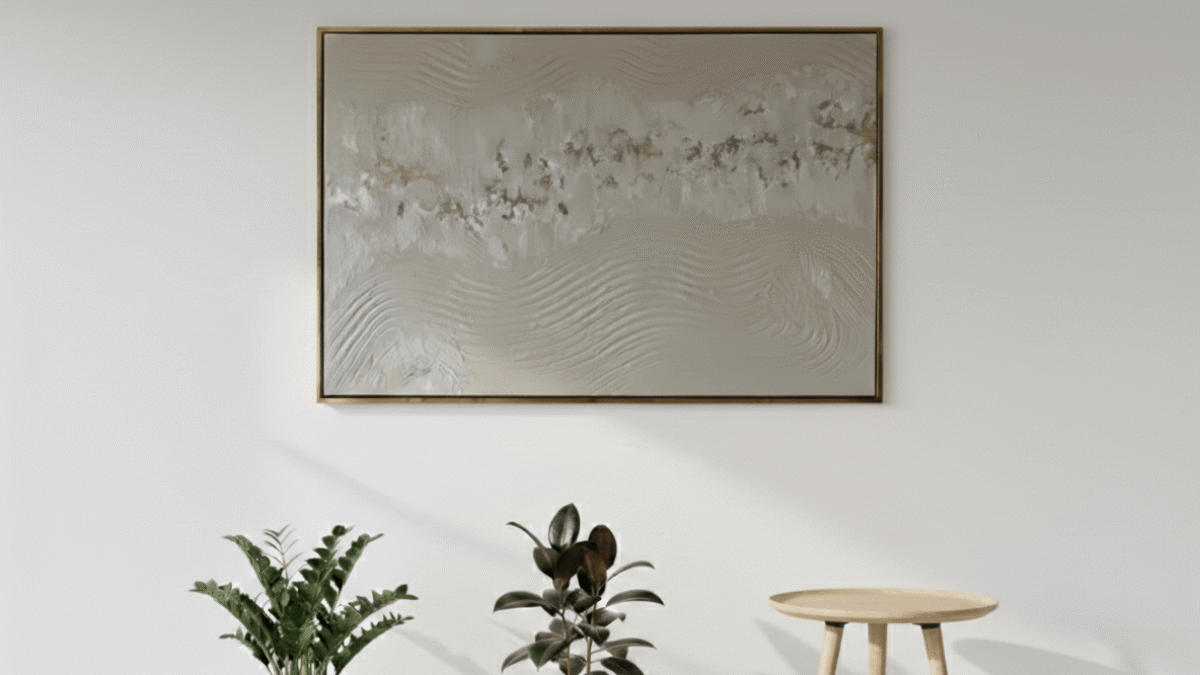
Placement is key. Hang textured wall art at eye level (about 60 inches from floor to center) as a solo statement or in thoughtful groupings. In living rooms, pair with neutral sofas to let the texture shine; in bedrooms, opt for calming earth tones above the bed.

Scale matters—oversized pieces (36x48 inches or larger) command attention in open-concept spaces, while smaller triptychs suit entryways. Lighting enhances drama: install picture lights or directional LEDs to cast intriguing shadows. Combine with other elements like woven baskets or wooden accents for cohesive, layered decor.
Incorporate textured canvas art into gallery walls by mixing with framed photos or mirrors. For rental-friendly options, use command strips or lean larger pieces on mantels. The result? Rooms that feel curated, warm, and distinctly yours.
Caring for Your Textured Wall Art: Longevity and Maintenance
Proper care ensures your investment lasts. Dust gently with a soft brush or microfiber cloth—avoid vacuums or harsh cleaners that could damage raised areas. Keep away from direct sunlight to prevent fading, and maintain stable humidity (40-60%) to avoid cracking. For sealed pieces, occasional wipe-downs with a damp cloth suffice. If cracks appear over time (common in thick layers), touch up with matching medium and reseal.
Professionally framed or gallery-wrapped options from sites like the textured collection often include built-in durability features.
Conclusion: Why Textured Wall Art Deserves a Spot in Every Home
Textured wall art bridges the gap between fine art and accessible decor. It invites interaction, sparks conversation, and infuses personality into sterile spaces. Whether you DIY a budget-friendly project or invest in a handcrafted abstract masterpiece, the transformative power is undeniable. Start small, experiment boldly, and watch your walls come alive with stories told through texture and tone. Your next home refresh awaits—embrace the dimension!
FAQ: Your Top Questions About Textured Wall Art Answered
Is textured wall art suitable for beginners? Absolutely! With basic supplies and no prior experience needed, anyone can create beautiful results. Start with small canvases to build confidence.
What's the difference between plaster and joint compound for DIY projects? Plaster offers a coarser, quicker-drying texture ideal for layered depth but can be heavier. Joint compound is smoother, more forgiving for beginners, and lightweight, though it dries slower. Both work wonderfully—choose based on your desired finish.
How much does professional textured wall art cost? Prices vary widely. DIY versions run $20-100 in materials, while gallery-quality hand-painted pieces start around $200-$400+ depending on size and artist. Sales and custom options make them accessible.
Will textured art crack over time? It can if layers are too thick or environments fluctuate. Using flexible additives and proper sealing minimizes this. Store or display in climate-controlled spaces for best results.
Can I use textured wall art outdoors? Only if specifically sealed for exterior use (UV-resistant and weatherproof mediums). Indoor applications are recommended for longevity.
Where can I find inspiration or buy unique pieces? Explore online collections for hand-painted abstracts, or search thrift stores for DIY bases. Communities on Pinterest and home decor blogs overflow with ideas.
How do I hang heavy textured pieces safely? Use sturdy hardware rated for the weight (plaster adds minimal heft). For extra-large works, consult a professional installer.